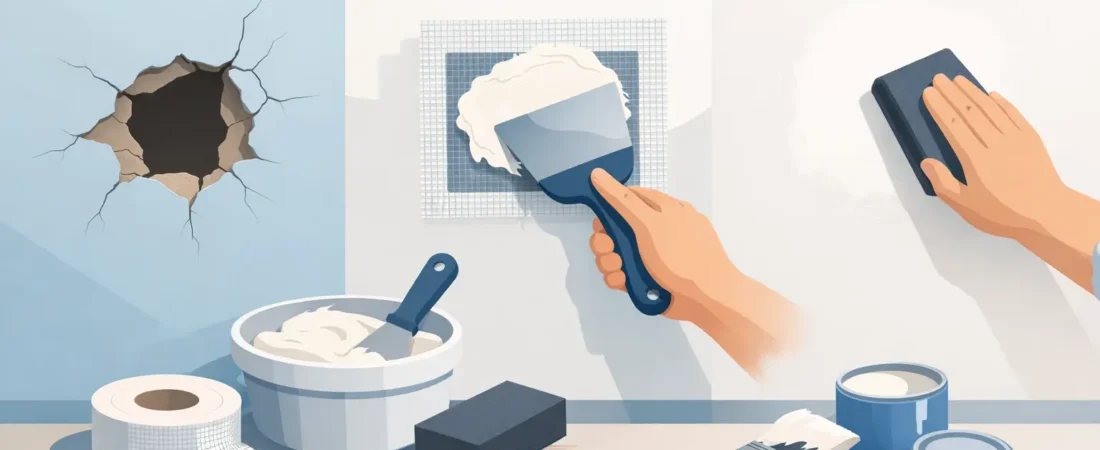
A hole in a plasterboard wall can make an otherwise tidy room feel unfinished, whether it came from a door handle, a misplaced piece of furniture or a fitting that has been removed. The good news is that most damage can be put right neatly. To repair hole in plasterboard wall damage properly, the key is matching the repair method to the size of the opening and making sure the area is stable before filling it.
A rushed patch may look acceptable for a day or two, but it can sink, crack or show through after painting. A careful repair creates a smooth surface that blends into the surrounding wall and is ready for decorating.
First, assess the damage
Before buying filler or cutting into the wall, check what has happened around the hole. A small dent or screw hole usually needs only filler. A larger opening, where plasterboard has broken away, needs support behind the surface before it can be repaired.
Press gently around the damaged area. If the plasterboard feels soft, loose or moves when touched, remove any crumbling material until you reach a firm edge. Do not simply cover damaged board with filler. The filler needs a sound surface to hold on to.
It is also worth considering why the hole appeared. Damage beside a door may need a door stop fitted or adjusted. A hole left by a wall-mounted television, shelf or radiator cover may reveal old fixings that should be removed or made safe. If there are wires, pipes or signs of damp nearby, stop and get the area checked before continuing.
What you will need for a plasterboard wall repair
For a minor repair, fine surface filler, a filling knife and fine sandpaper may be enough. For a hole larger than a couple of centimetres, you will usually need a plasterboard patch or off-cut, jointing compound, scrim tape and a small piece of timber backing.
A dust sheet, safety glasses and a face mask are sensible too, particularly when sanding. Plasterboard dust travels further than most people expect and can settle on furniture, flooring and freshly painted surfaces.
Use a filler designed for interior wall repairs, rather than relying on decorators’ caulk. Caulk has its place around gaps and edges, but it is flexible and is not designed to rebuild a damaged section of wall.
Repairing small holes and dents
Small nail holes, picture-hook marks and shallow dents are the most straightforward repairs. Start by brushing away dust and loose paint. If the edge is raised, lightly sand it so the repair will sit level with the wall.
Apply a small amount of filler with a filling knife, pressing it into the hole rather than leaving it on the surface. Draw the knife across the area in different directions to leave a thin, even finish. It is better to apply two light coats than one thick coat, as thick filler can shrink while drying.
Once dry, sand the repaired spot gently until it feels flush to the touch. Run your hand across it as well as looking at it. A side light from a lamp or window will often reveal a ridge that is hard to see head-on. Wipe away dust, apply a mist coat of paint if needed, and then repaint the area.
For the best colour match, paint the whole wall or at least paint from corner to corner where practical. Touching up one small area can sometimes leave a visible patch, especially on walls exposed to strong daylight or finished in darker colours.
How to repair a hole in a plasterboard wall over 5cm
A larger hole needs a stronger repair. Filling a deep opening with compound alone is likely to crack or fall back into the wall cavity. The aim is to create a firm backing, fit a new piece of plasterboard and blend the joins into the existing surface.
First, cut the broken area into a tidy square or rectangle. This may seem counterintuitive, but a clean shape makes it far easier to fit a patch accurately. Use a sharp knife or plasterboard saw, working carefully and only as deep as the board itself.
Check the cavity before cutting or fixing anything. Electrical cables and pipework can run behind plasterboard, particularly close to sockets, switches, radiators, kitchens and bathrooms. If you are not confident about what sits behind the wall, do not proceed with screws or deeper cuts.
Cut a short piece of timber that is longer than the opening. Slide it into the hole, position it behind the plasterboard and hold it firmly while fixing a screw through the existing wall on each side of the opening. The timber should sit flat behind the board, creating support for the patch. Take care not to over-tighten the screws, as this can damage the surrounding plasterboard.
Next, cut a plasterboard patch to fit the hole. It should sit neatly without force and be level with the wall face. Fix it to the timber backing with suitable plasterboard screws. If the patch is proud or recessed, adjust it now. Compound will hide small imperfections, but it cannot reliably correct a badly fitted patch.
Place scrim tape over each joint, then apply a thin layer of jointing compound across the patch and slightly beyond its edges. Feathering the compound out is what makes the repair disappear. Allow it to dry fully, then apply one or two wider, thinner coats as needed. Sand lightly between coats and avoid creating a hard ridge at the outer edge.
When the final coat is dry and smooth, remove all dust before priming and painting. Fresh compound absorbs paint differently from an established painted wall, so primer or a light first coat helps achieve an even finish.
When a repair needs more than filler
Not every damaged wall is a simple plasterboard patch. Repeated cracks, staining, bubbling paint or a soft area can point to a leak, condensation problem or movement in the structure. Repairing the visible hole without addressing the cause may mean the same problem returns.
Damage around a socket, light switch, plumbing connection or electrical cable needs extra caution. Never fill around live electrical fittings or assume a cable is out of the way because it cannot be seen. Likewise, a wall damaged by a leak should be allowed to dry properly and the source of the water fixed first.
There is also a practical judgement to make about finish quality. In a spare room, a competent DIY repair may be perfectly suitable. In a hallway, living room or rental property between tenancies, a smooth repair and well-matched paint finish can make a real difference to the appearance of the space.
Common mistakes that make the patch show
The most common problem is applying too much filler at once. It takes longer to dry, is harder to sand flat and often shrinks into the hole. Building up light layers is slower, but it produces a more reliable result.
Another mistake is sanding aggressively. The goal is to level the compound, not to sand through the surrounding paint or tear the paper face of the plasterboard. Use fine sandpaper and light pressure. If you expose the brown paper beneath the paint, seal it before applying more compound or paint.
Skipping the backing support on a larger hole is also a false economy. A patch needs something solid to fix to, especially on a wall that may be knocked, leaned against or used near a door. Finally, do not paint before filler or compound has dried completely. Trapped moisture can affect the finish and make the repaired area stand out.
Choosing professional help
A professional repair is often the sensible choice when the damage is large, awkwardly placed or linked to another household issue. It can also save time if you need plasterboard repair, filling, sanding and painting completed neatly in one visit.
For homeowners, landlords and busy households across London and nearby counties, Handy House can help with wall repairs and the decorating work that follows. A careful repair is not just about closing a hole – it is about leaving the room looking properly cared for.
If you decide to tackle a small repair yourself, take your time with the preparation and final sanding. Those quiet, unglamorous stages are usually what turn a visible patch into a wall you no longer notice.